

This short article will guide you through the build and configuration of Qt in debug mode with which you will be able to step-debug into Qt core libraries from QGIS.
Building QGIS from sources is not hard at all on a recent linux box, but what about if you wanted to be able to step-debug into Qt core or if you wanted to build QGIS agains the latest Qt release? Here things become tricky. This short post is about my experiments to build Qt and and other Qt-based dependencies for QGIS in order to get a complete debugger-friendly build of QGIS. Start with downloading the latest Qt installer from Qt official website: https://www.qt.io/download-qt-for-application-development choose the Open Source version.


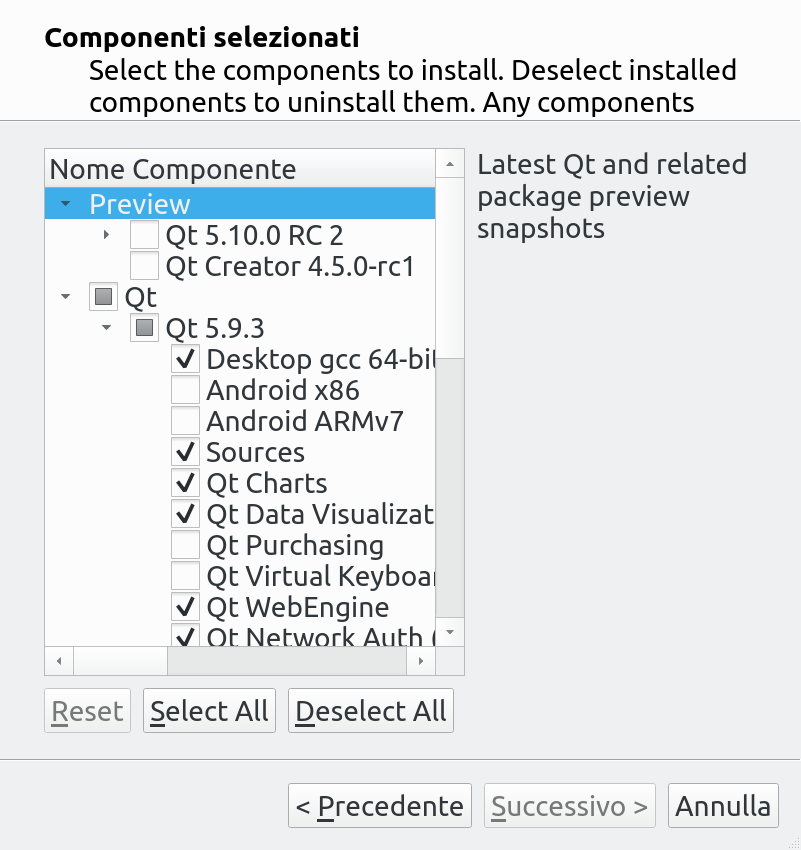
 Now install the Qt version you want to build, make sure you check the Sources and the components you might need.
 Whe you are done with that, you’ll have your sources in a location like
 /home/user/Qt/5.9.3/Src/
To build the sources, you can change into that directory and issue the following command – I assume that you have already installed all the dependencies normally needed to build C++ Qt programs – I’m using clang here but feel free to choose gcc, we are going to install the new Qt build into /opt/qt593.
./configure -prefix /opt/qt593 -debug -opensource -confirm-license -ccache -platform linux-clangWhen done, you can build it with
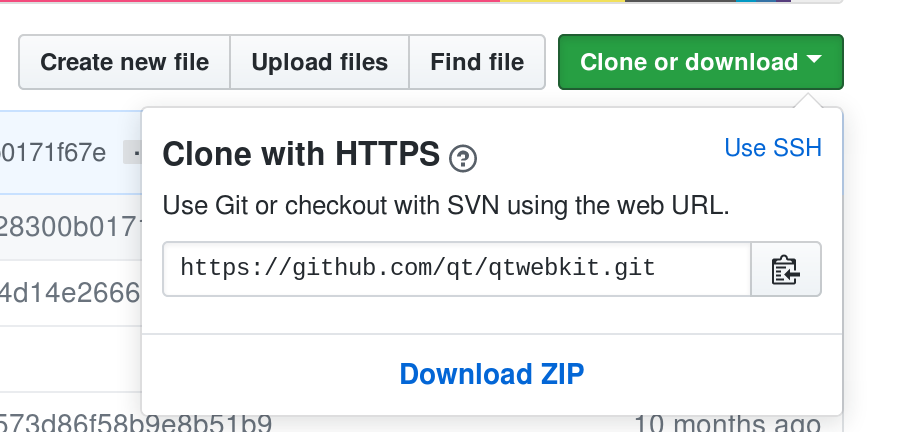
make -j9
sudo make install
To build QGIS you also need three additional Qt packages QtWebKit from https://github.com/qt/qtwebkit (you can just download the zip):
 Extract it somewhere and build it with
/opt/qt593/bin/qmake WebKit.pro
make -j9
sudo make install
Same with QScintila2 from https://www.riverbankcomputing.com/software/qscintilla
/opt/qt593/bin/qmake qscintilla.pro
make -j9
sudo make install
QWT is also needed and it can be downloaded from https://sourceforge.net/projects/qwt/files/qwt/6.1.3/ but it requires a small edit in
qwtconfig.pri before you can build it: set QWT_INSTALL_PREFIX = /opt/qt593_libs/qwt-6.1.3 to install it in a different folder than the default one (that would possibly overwrite a system install of QWT).
The build it with:
/opt/qt593/bin/qmake qwt.pro
make -j9
sudo make install
If everything went fine, you can now configure Qt Creator to use this new debug build of Qt: start with creating a new kit (you can probably clone a working Qt5 kit if you have one). What you need to change is the Qt version (the path to cmake) to point to your brand new Qt build,:
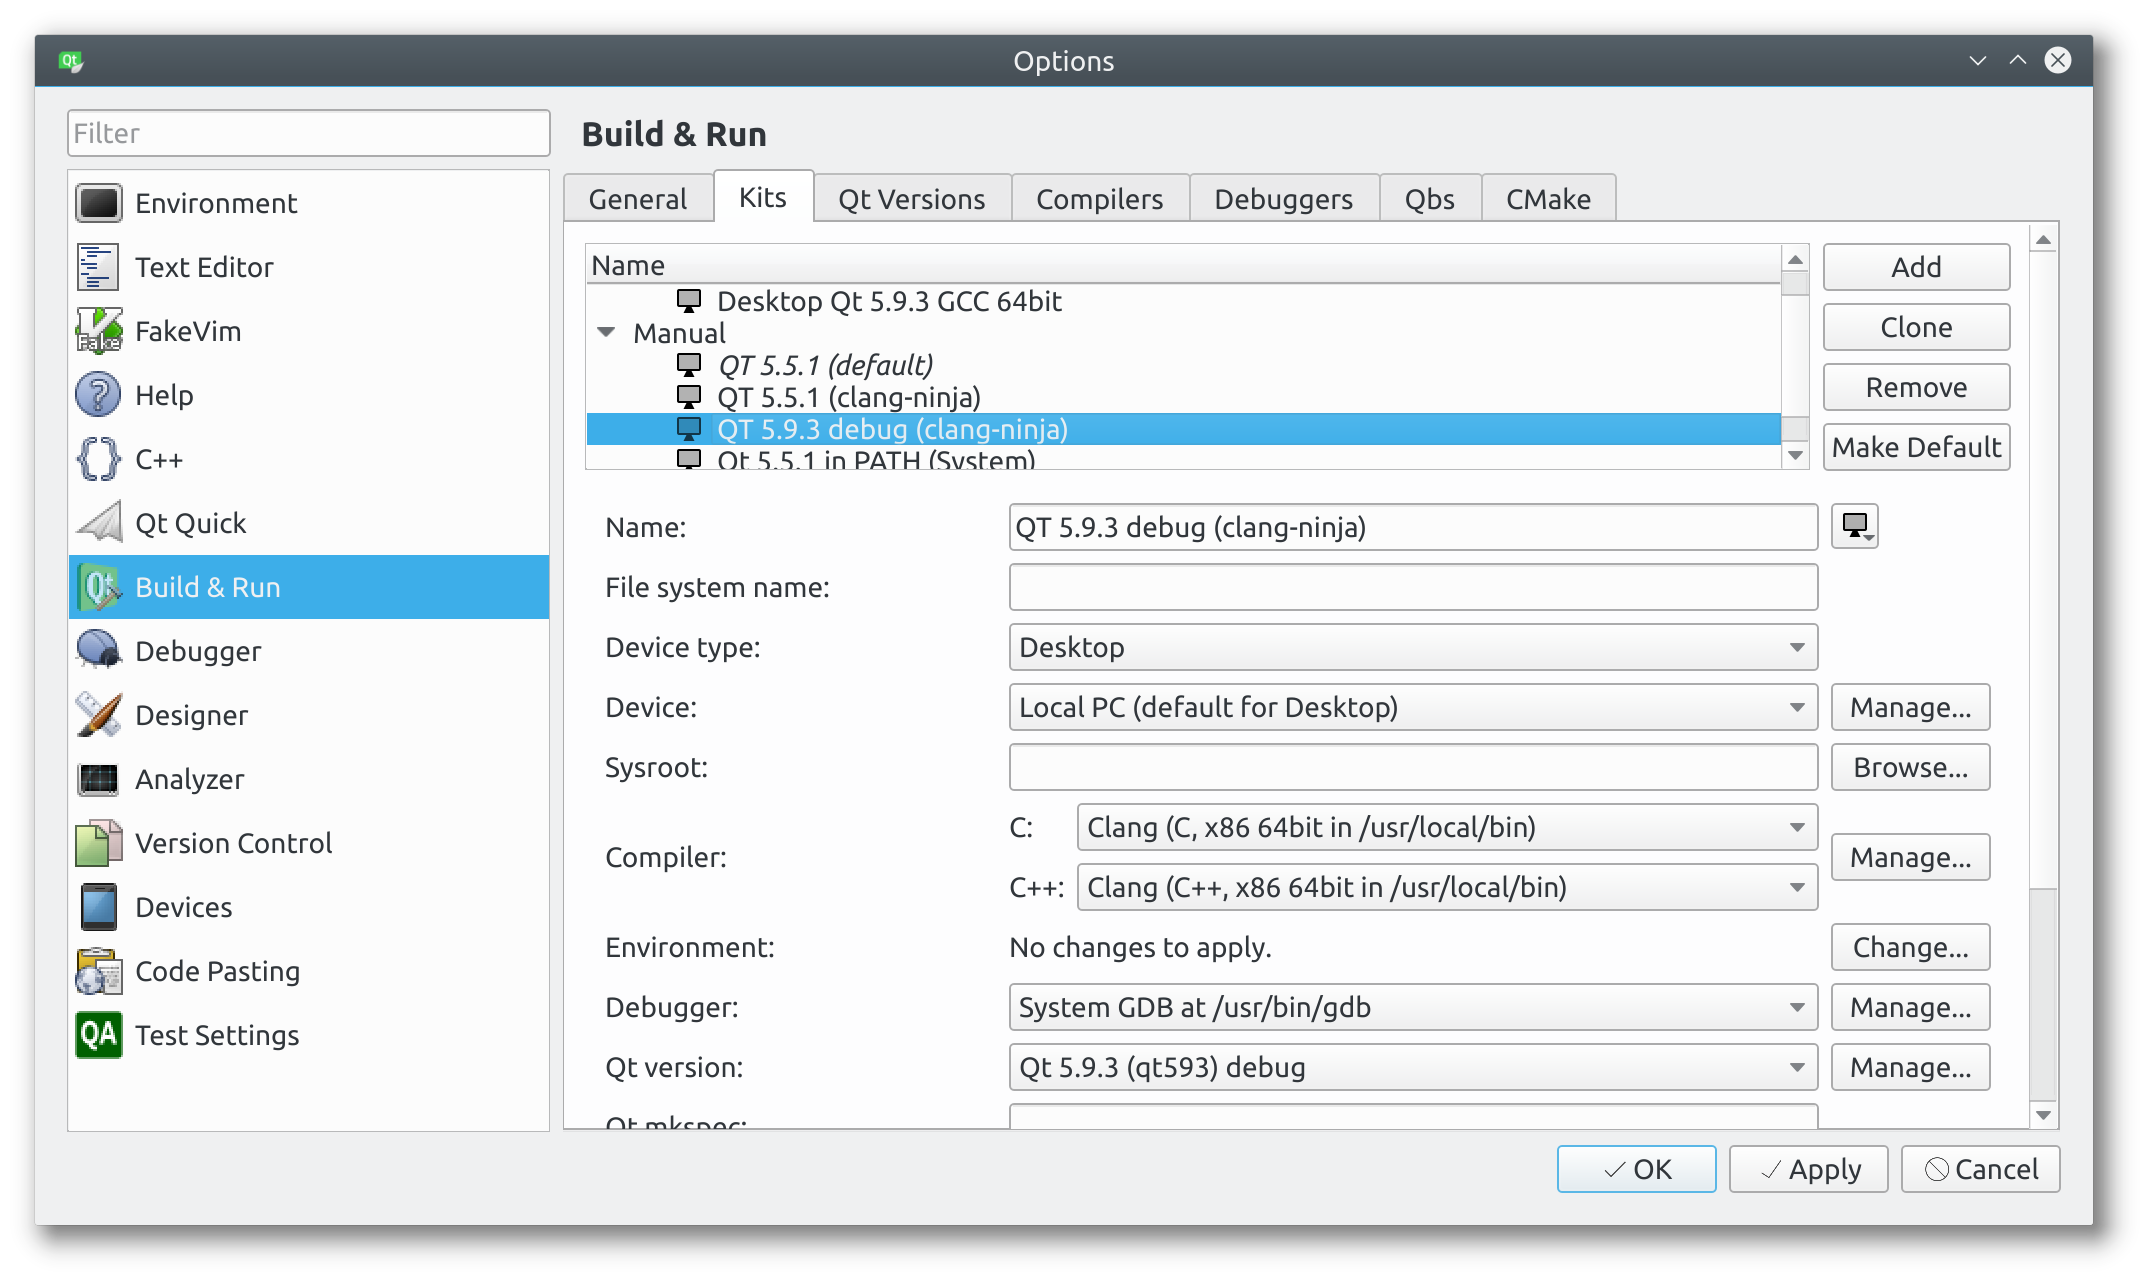 Pick up a name and choose the Qt version, but before doing that you need to click on Manage… to create a new one:
 Now you should be able to build QGIS using your new Qt build, just make sure you disable the bindings in the CMake configuration: unfortunately you’d also need to build PyQt in order to create the bindings.
Whe QGIS is built using this debug-enabled Qt, you will be able to step-debug into Qt core libraries!
Happy debugging!
Now you should be able to build QGIS using your new Qt build, just make sure you disable the bindings in the CMake configuration: unfortunately you’d also need to build PyQt in order to create the bindings.
Whe QGIS is built using this debug-enabled Qt, you will be able to step-debug into Qt core libraries!
Happy debugging!